
Concrete does not forgive. Once the slab is poured over your plumbing, a wrong slope, a leaky joint or a pipe in the wrong place can only be fixed by breaking concrete. The plumbing rough-in, done in the hours before casting, decides whether your bathrooms drain properly for the next thirty years.
This guide walks through it the way a site engineer checks it: the two pipe systems, the sizes, the slopes, and the tests that must pass before the concrete truck arrives.
1. Two systems, one slab — and they work in opposite ways
Every house has two plumbing systems that behave in opposite ways. The water supply system is pressurised: clean water is pushed through relatively small pipes — typically 15 to 25 mm CPVC on Indian residential drawings, GI on older ones — to every tap, shower and flush tank. The drainage system works by gravity alone: wastewater flows downhill through much larger pipes, 75 mm, 110 mm, even 160 mm, to the stack and out to the sewer or septic tank.
Drainage splits into three parts. Soil pipes carry waste from WCs; waste pipes carry water from basins, sinks, showers and floor drains. Vent pipes carry air, not water — they let air in so a flush in one bathroom does not siphon the water seal out of a trap in another, and they carry smells safely above the roof. A vent forgotten or capped is a smell problem waiting for the first flush.
Both systems must be on the same drawing before the slab is cast, because both go into it. Supply pipes are usually laid in the slab or in wall chases; drainage pipes run in the sunken portion of bathroom slabs, sloping toward the stack. If the drawing shows only one system, the other gets improvised on site — and improvised plumbing is what you end up breaking concrete to fix.

2. Pipe sizes that actually get used on Indian houses
Pipe sizes come from the plumbing drawing, which the designer sizes from the fixtures and run lengths. The sizes below are what you will commonly see on an Indian residential drawing — knowing them lets you spot a substitution on site.
| Pipe | Carries | Common size | Site check |
|---|---|---|---|
| Water supply | Clean water to taps and flush tanks | 15–25 mm CPVC (GI on older work) | Check brand and pressure rating printed on the pipe |
| Soil | Waste from WCs | 110 mm | Must fall continuously toward the stack |
| Waste | Basins, sinks, showers, floor drains | 75 mm | Each fixture needs its own trap |
| Vent | Air only — protects traps, vents smells | 75 mm, rising above the roof | Must stay open at the top, never capped |
Two routing rules matter as much as the sizes. First, never run a pipe under a bearing wall or a column footing if the drawing gives you any alternative — the wall settles differently from the pipe, and the joint is where it breaks. Where a pipe must pass through a footing or wall, it goes through a sleeve — a larger pipe section cast in place — so the pipe can move slightly without cracking. Second, never cut through a beam to pass a pipe without the structural engineer's written approval. Final member sizing, reinforcement, foundation selection and any cutting of structural members require project-specific assessment by a qualified structural engineer.
3. Slope: the one detail that decides whether drains work
A drain has no pump. Water moves because the pipe falls, millimetre by millimetre, toward the stack. The fall is a ratio: 1 in 40 means the pipe drops 1 mm for every 40 mm of run — about 25 mm over a metre. Get it right and the drain carries water and solids together at a speed that cleans the pipe as it goes; get it wrong and the same pipe blocks within months.
Indicative falls in Indian practice, aligned with IS 1742 (the code for building drainage): a 100–110 mm soil or waste branch falls at about 1 in 40 to 1 in 60, and larger horizontal drains run gentler, around 1 in 80 to 1 in 110. Check these against your plumbing drawing — the drawing governs, and the engineer may specify a different fall for a long run or a special fixture.
Both errors block the drain. Too flat, and water stands, solids settle, and the line chokes. Too steep, and water races ahead leaving solids stranded — which also blocks, faster, where you cannot see it. The sweet spot is self-cleaning velocity: fast enough to carry solids all the way to the stack.
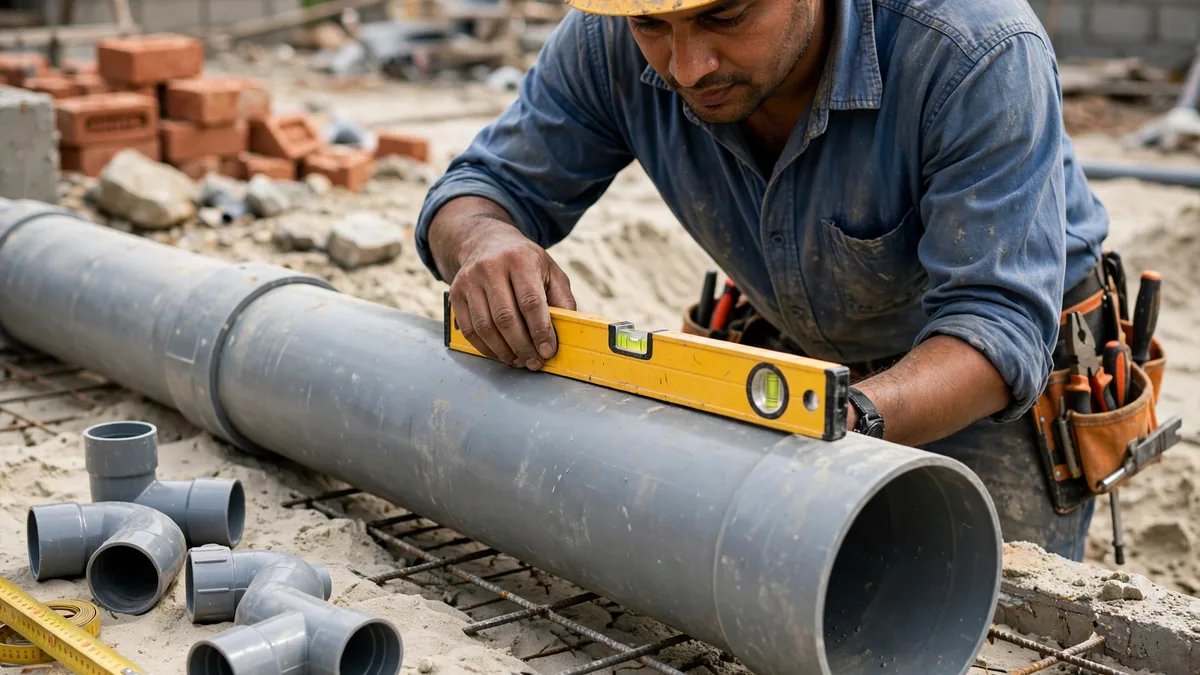
On site, slope is checked, not eyeballed: the plumber sets the fall with a string line or spirit level at every joint. Pipes must be supported along their length — a sag creates a belly that holds water even when the ends are level. Bedding must be uniform sand or fine soil, with no rocks or sharp debris that can point-load and crack the pipe under slab load.
4. The sunken slab and fixture positions — fixed now, or never
Bathrooms in Indian homes usually sit in a sunken slab: the bathroom floor is cast lower than the main slab so waste pipes can run below it and still fall toward the stack. That sunken portion is where the toilet outlet, the basin waste, the shower drain and the floor trap all connect — and the depth of the sink is set in the structural drawing, because it changes the slab itself.
Every fixture position is fixed at this stage. The WC drain centre, the basin waste, the floor drain — once the slab is cast, moving any of them means breaking concrete. Positions must come from the fixture's own rough-in drawing, not from memory. As an example, a WC drain centre is commonly set around 380 mm (about 15 inches) from the finished side wall — but that varies by model, so confirm it against your WC's drawing first.
The bathroom floor must also slope gently toward the floor drain so water never stands — the slope is finished with the screed, but the drain position is decided now. Every open pipe end must be capped before the pour, so concrete and debris cannot get inside a pipe you can no longer reach. Mark the pipe positions on the shuttering and photograph the whole layout — that photograph is your map if anything ever needs finding later. Our guide to RCC slab casting covers the rest of the pre-pour checks, from shuttering to curing.
5. Before the concrete: test everything, while a fix is still cheap
The rule is simple: no pipe is buried until it has been tested. A leak found now is a five-minute fix. The same leak found after the slab is cast is a demolition job, a re-laid pipe, re-waterproofing and a re-finished floor.
For the water supply lines, the plumber caps every end, fills the system and pressurises it, then holds the pressure while every joint is checked. Any joint that weeps gets remade — a solvent weld not fully seated, a threaded joint short on sealant, a fitting forced into alignment. For drainage, the line is plugged and filled, and the level is watched — a falling level means a leaking joint.
The test only counts if it is witnessed. The homeowner or site engineer should be present, see the pressure holding, and note the result before the pour is approved. A test nobody watched may never have happened.
Verify the approved plumbing and structural drawings before adopting any pipe size, slope or sleeve detail in this guide. Sizes, falls and sunken-slab depths are set by your project's drawings — this article shows what to check, not what to build.

6. Seven mistakes that turn into demolition
1. Wrong slope. A drain laid flat, or too steep, blocks within months. Check the fall with a level at every joint.
2. Joints never tested before the pour. A solvent weld not fully seated leaks for years under the slab. Test, witness it, then approve the pour.
3. Sharp 90-degree bends instead of long sweeps. Waste turns a corner best through a long-sweep bend or two 45-degree bends; a sharp elbow is where solids collect and a cleaning rod gets stuck.
4. Pipes under bearing walls or footings without sleeves. Settlement cracks the pipe at the wall line. Route around footings; sleeve where you cannot.
5. No supports, or rocky bedding. An unsupported pipe sags and holds water; sharp stones crack it under slab load. Sand bedding, supports at regular intervals.
6. Fixture positions from memory. A WC set 50 mm off its rough-in means a new WC will not fit, or the soil pipe must be cut and re-laid. Take every position from the fixture's drawing.
7. The vent forgotten or capped. Without a vent, flushing one WC can siphon the water seal out of a basin trap in the next bathroom — and the smell follows. Vents rise above the roof and stay open.
7. The pre-pour plumbing inspection: ten checks in ten minutes
- Plumbing drawing on site; every pipe on it laid — supply, soil, waste and vent.
- Pipe sizes match the drawing; brand and pressure rating printed on each pipe.
- Every horizontal drain falls continuously toward the stack — level-checked, no dips or bellies.
- Long-sweep bends at every turn; no sharp 90-degree elbows in drainage runs.
- All joints solvent-welded or sealed properly; no dry joints, no forced fittings.
- Water supply lines pressure-tested and holding; drainage lines water-tested; both witnessed.
- Every open pipe end capped against concrete and debris.
- Sleeves where pipes pass through footings or walls; no pipe under a bearing wall without one.
- Fixture positions measured from fixture drawings — WC centre, basin waste, floor drain.
- Pipe positions marked on the shuttering and photographed before the pour.
8. What it costs to get it wrong
A leak under a slab rarely announces itself at once. It shows up as a damp patch on the ceiling below, seepage along a wall, or a water bill that climbs for no reason. By then the repair means cutting the slab, finding the failed joint, re-laying the pipe, re-waterproofing the sunken slab and re-finishing the floor — days of work in a finished house, and a bill that dwarfs the hour the inspection would have taken. Our terrace waterproofing guide explains the methods and the mistakes that cause leaks.
The rough-in is the cheapest hour in the whole build. Walk the slab with the drawing, run the ten checks above, watch the pressure hold — and only then let the concrete come. Planning a build in Uttar Pradesh or Delhi NCR? Talk to the RTPL team.
Last reviewed: 11 November 2026. Slope figures are indicative practice aligned with IS 1742, from web search results — your plumbing drawing governs. No test pressures or durations are stated, as none were verified. Codes are cited as governing references only, without clause numbers.
